Building a Larger Crucible
I’ve been perfectly happy with my Silicon Carbide Crucible and the tongs I built for it over 20 years ago. Most of the castings I pour rarely even use the full crucible.
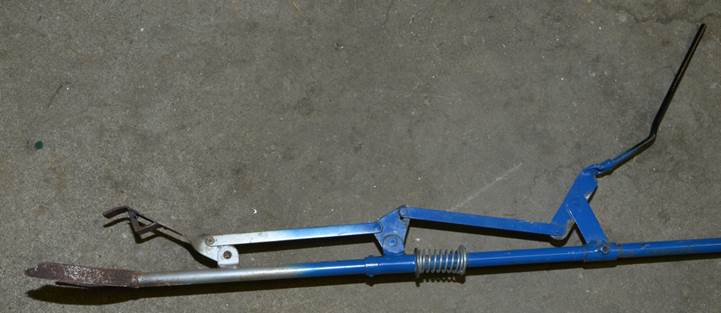
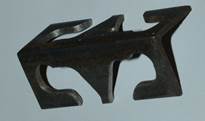
The tongs have an over center lever that pushes the spring loaded arm down onto the top of the crucible while the C shaped tapered ring is used to lift and rotate the crucible.
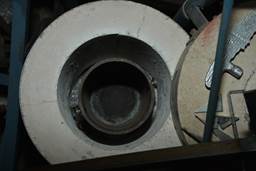
A new project surfaced that my Alibre CAD software told me would need closer to 10 lbs of aluminium. That means the #6 and the still unused #8 would be useless. It was time to rethink using a steel crucible, which in general has a bad reputation for adding impurities to aluminium. I also have lots of scrap that doesn’t fit into the #6 or # 8 so a lot of time is spent on the band saw making the scrap smaller. Seems a larger crucible might have additional use than just for one casting.
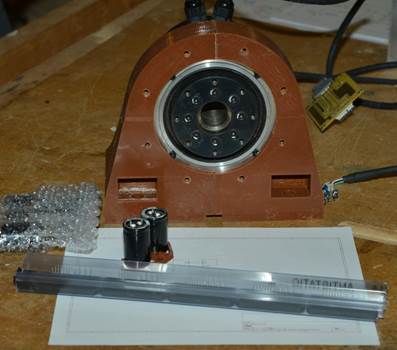
The pattern is a tapered version of the 3D printed model to hold a 4th Axis Harmonic Drive for the milling machine. That’s a project that still needs a face plate.
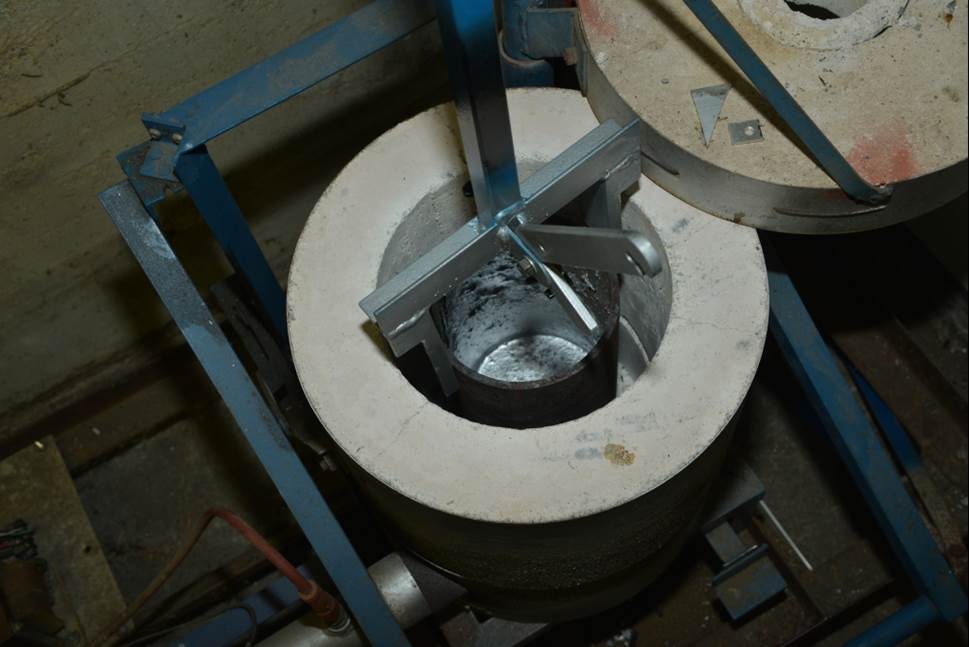
Anyway, I went out to the local metal shop and bought some 6” heavy wall pipe. A friend TIG welded a plate to the bottom and then turned a radius on the bottom with his MACH3 controlled CNC lathe. The radius showed the weld had good penetration and likely wouldn’t develop pinhole leaks which some steel crucibles are prone to do.
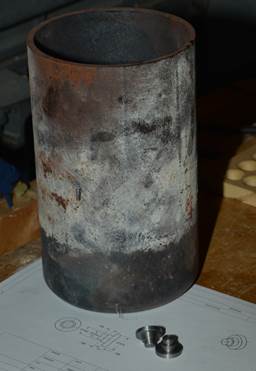
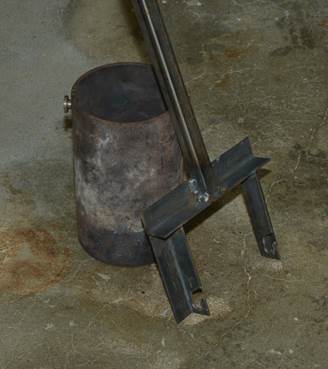
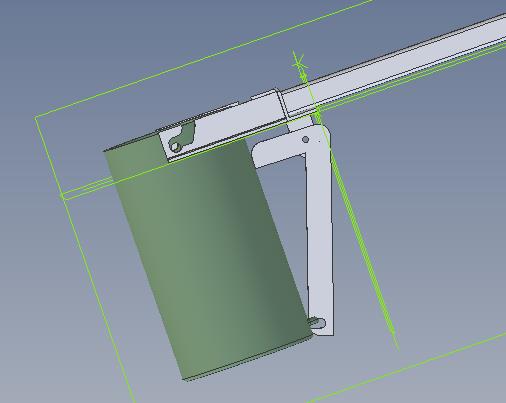
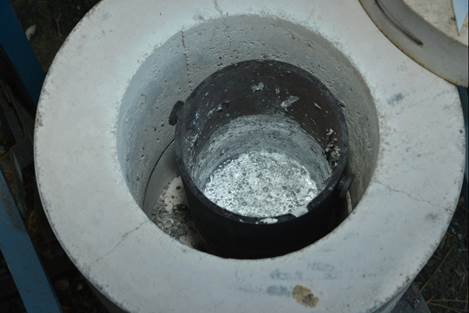
This photo shows the welded and once fired empty crucible. It’s sitting on an Alibre CAD drawing that show the two lifting studs. I thought I’d model this after the large rail mounted crucibles I’ve seen in factories. Although clearly this is way too complicated.
The other issue with a large crucible is that my foundry is sized to the Dave Gingery Gas Fired Lifting Furnace doesn’t have room on the outside for standard tongs. And I didn’t want to drill holes in the sides and compress hooks into holes to lift it out although that would have been the easy way. Had I done it this way I’d already be pouring metal. I didn’t want to have my hands too close to the top of the furnace or crucible to pull it out. I wanted a longer handle.
So first let’s skip ahead to the finished product to show where I’m going with this. Then I’ll break down the various photos.
I used LinuxCNC to cut these slots into scrap in order to practice and work out the best way to do this. I want to be able to lower the two lifting bars into the furnace
There’s
not a lot of room around the outside
So
these hooks can be slipped over the posts but held captive by the outside of
the studs.
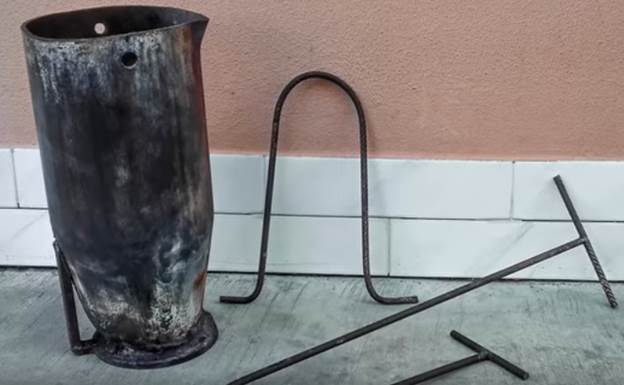
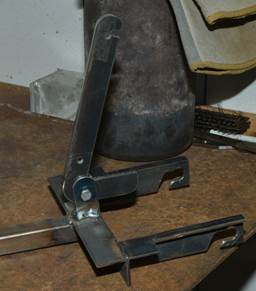
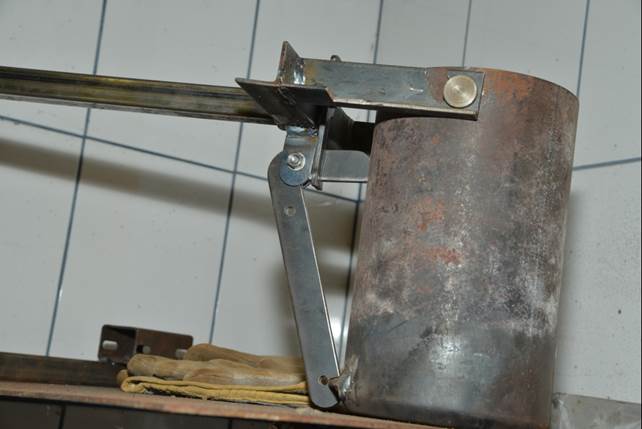
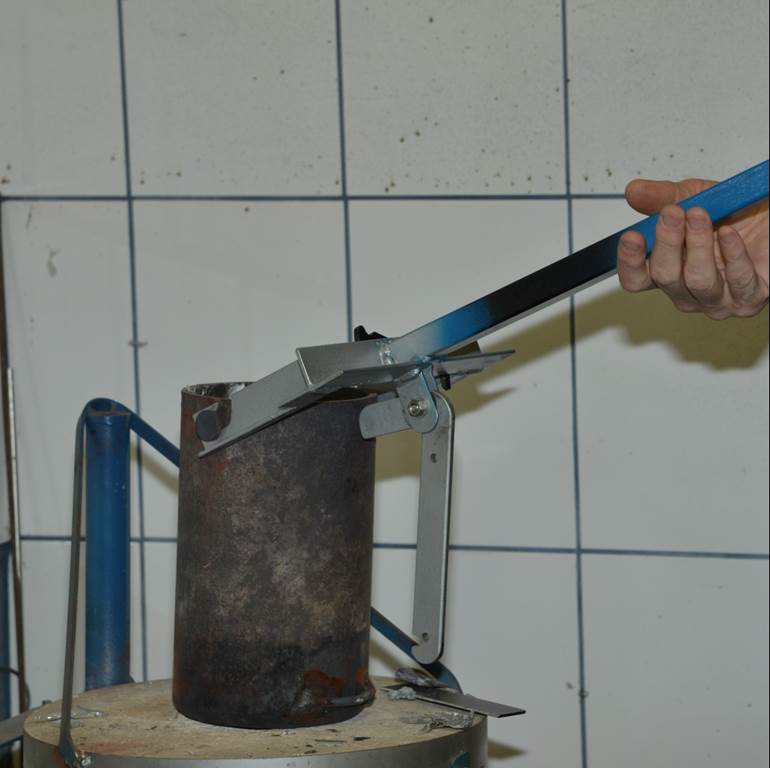
This photo shows the completed hook assembly
welded to hook under the posts and lift the crucible straight out of the
furnace. Setting the crucible down and
pivoting the handle to the horizontal position would allow me to lift but it’s
unstable so I need a triangular connection to keep the handle horizontal. A pivoting clamp seemed like a good idea.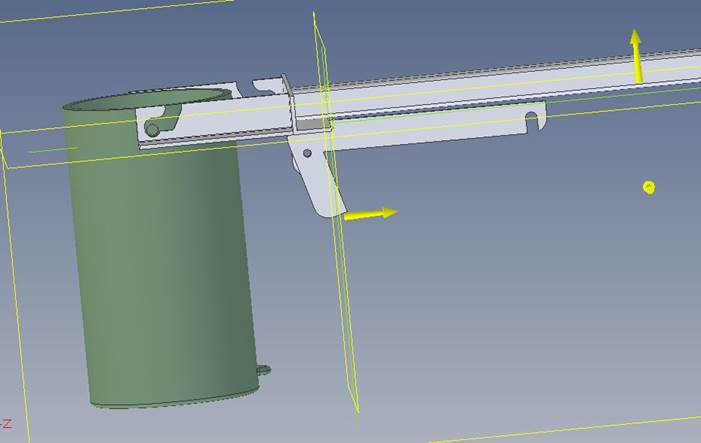
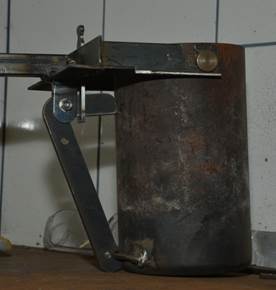
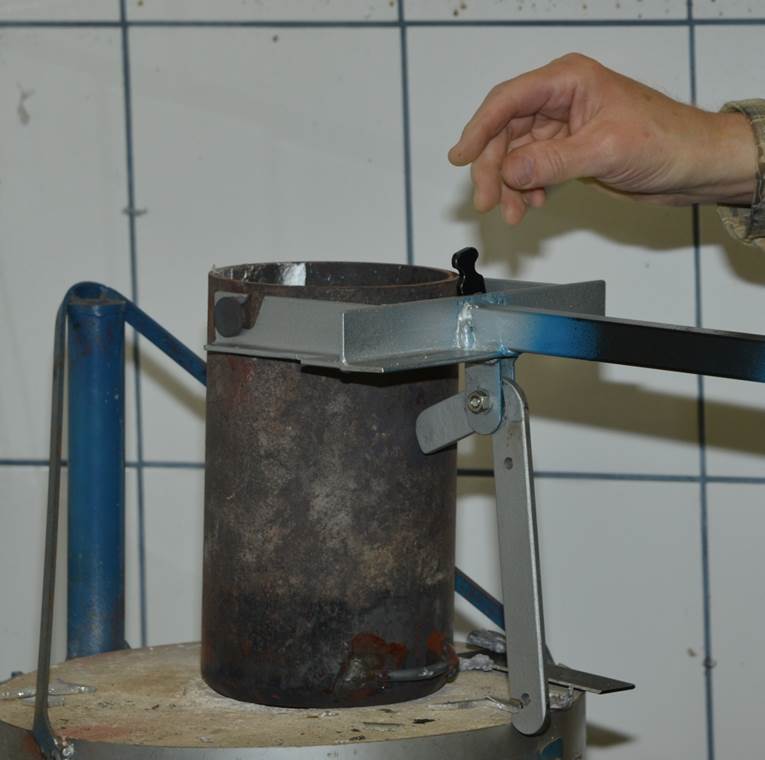
With
the clamp down and hooked to the loop and the two slots with the slight dip the
entire system should be secure. The
upper part of the clamp also prevents the handle from sliding so that the hooks
detach.
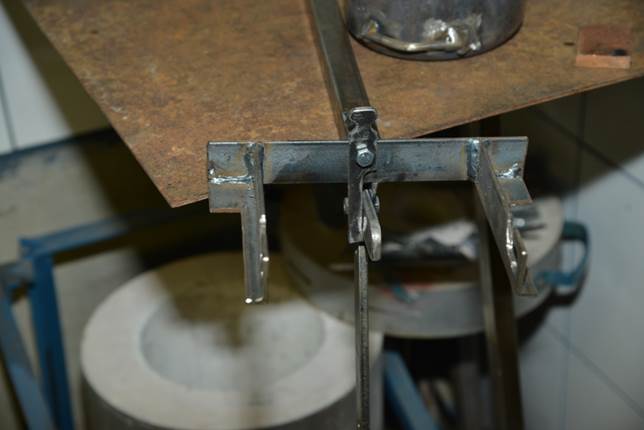
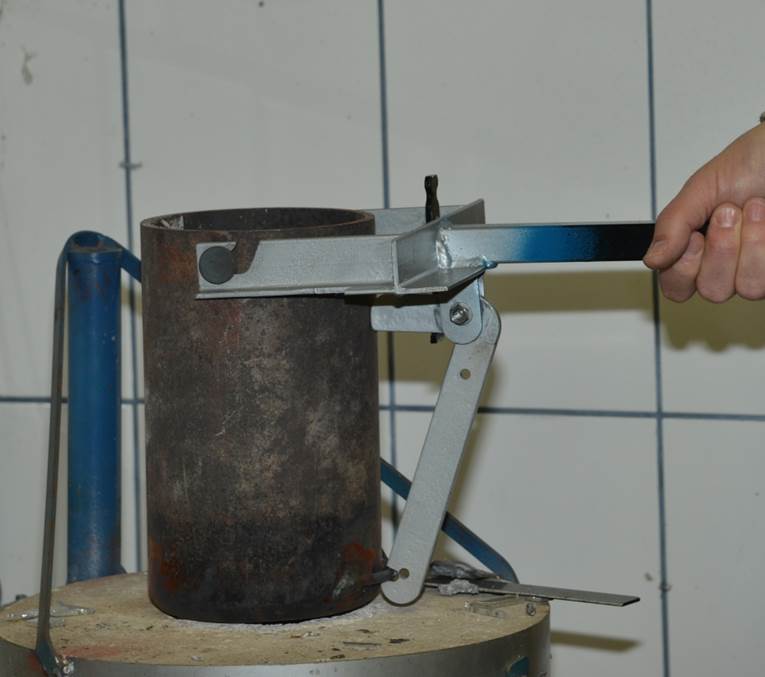
I
drew up the tangs to hold the crucible clamp, machined them and welded them
onto the handle. You can also see that
the hook sections have now been narrowed down to fit into the furnace but still
left with a bit of angle for strength.
A small section of ¼” rod was welded onto the bottom while the clamp was in the down position. I also built a small flip latch that serves to keep the clamp up during the initial removal of the crucible from the furnace and keeps it down while pouring.
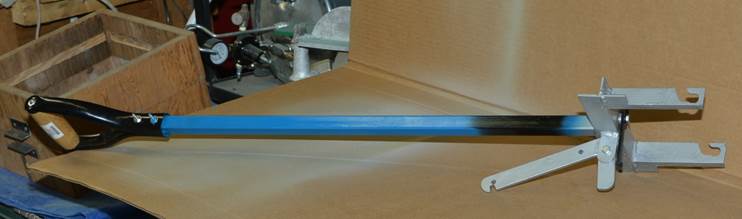
And here’s the assembly all latched together.
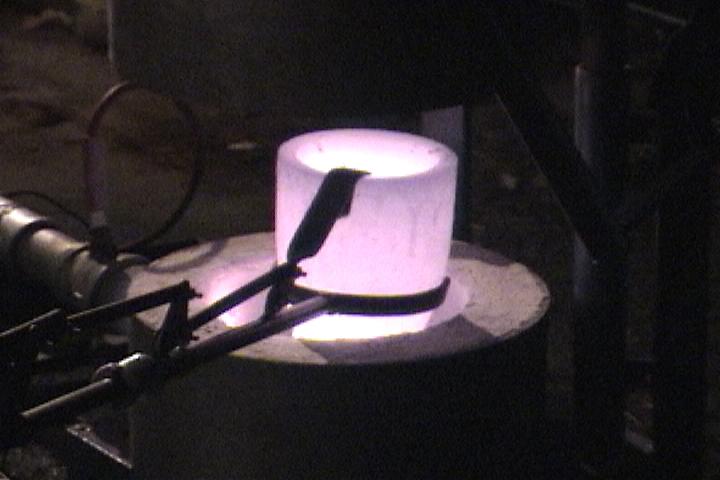
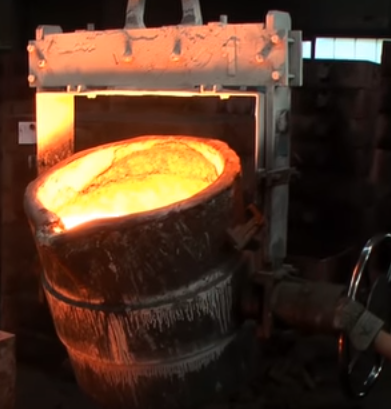
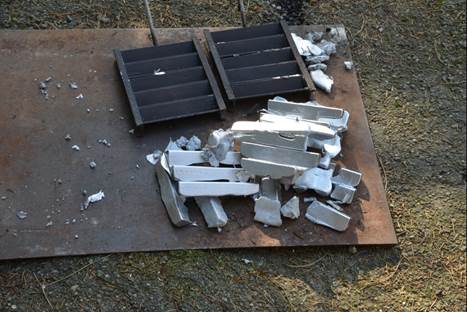
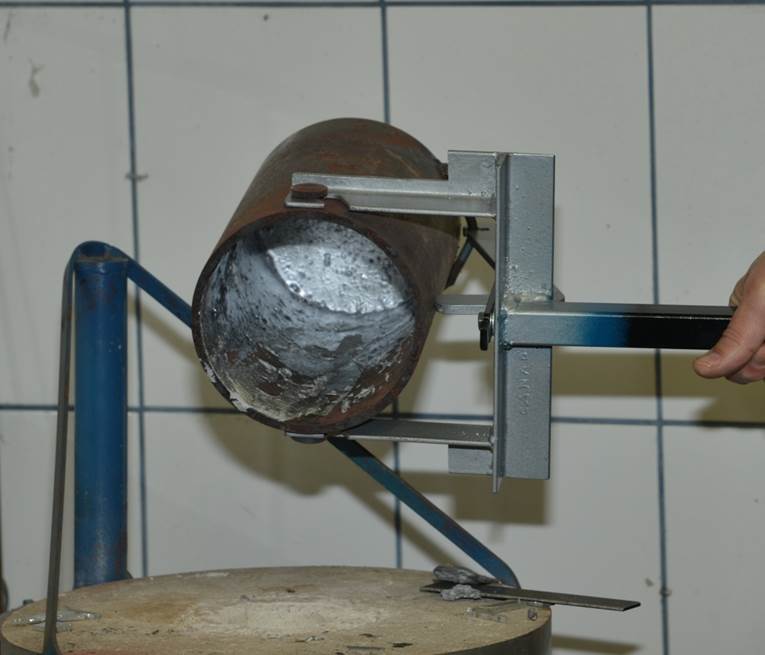
And the end result is I was able to melt about 10 lbs of metal and roughly pour ingots; although the metal did splash around a lot. The end of the pouring shank clearly requires a handle to help twist the assembly which with all the metal weighed over 20 lbs.
And that’s why there’s now a D handle at the end of the pouring shank/handle. High temperature paint on the tangs, blue for the shaft and black where I expect to put my hands. I may still put a second T bar through the lower section to help hold and twist the crucible.
In real life I’d be wearing protective gear. These photos are just a demonstration of how to hook and lift the crucible then pivot and pour. The lid of the furnace is pivoted out of the way. The handle is lowered into the furnace and hooked over the pins. It’s easy to keep my gloved hands about 2 to 3 feet from the very hot furnace opening.
Notice that the hooks are narrowed so they clear the furnace body with plenty of room but still have some of the right angle HRS to provide strength.
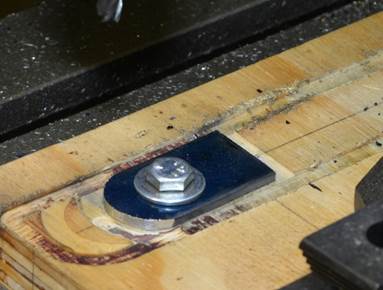
 Next for the convenience of the photo I set
it down on the closed furnace lid. Here
you can see how the hooks fit over the pins but are captured by the larger
diameter portion of the crucible pins.
There’s actually a fair amount of slop to make it easy to hook. The little black lever hook is in the down
position and prevents the latch from flopping down.
Next for the convenience of the photo I set
it down on the closed furnace lid. Here
you can see how the hooks fit over the pins but are captured by the larger
diameter portion of the crucible pins.
There’s actually a fair amount of slop to make it easy to hook. The little black lever hook is in the down
position and prevents the latch from flopping down.
The black latch has been pivoted out of the way. I use the other tongs to do this. My gloved hands don’t actually get that close to the hot crucible but for the sake of the picture demo you can see me pivoting it out of the way.
The handle is moved until the clamp pivots down onto the now red hot loop at the bottom of the crucible. It’s a bit of a finicky operation here and has required a slight tap on the clamp to hook in on. At that point the small black latch either slips into place by gravity or needs a tiny push with the tongs and then the crucible is clamped and captured.
The extra holes were already in the 3/16” plate I cut the clamp from. I thought about welding them closed but didn’t see the need.
Finally with the D handle used to twist it’s possible to turn and pour from a variety of different angles. Over time I’ll figure out the best balance point and perhaps forge in a pouring lip. I’ve also thought about shifting the axis of the handle closer to the middle of the crucible so that it pivots more easily. But then lifting straight up is compromised.
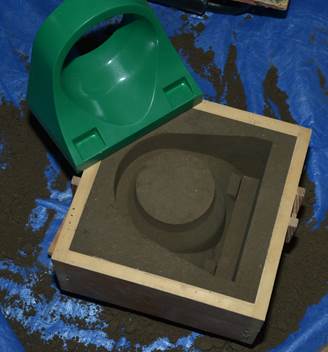
This large plate is one of the reasons for the larger crucible. I’ve trial fit where I’ll put one of the risers and the pouring sprue into the brand new flask I just built specifically for this larger pattern. I borrowed the flask alignment pins from a smaller flask. They help slide the cope onto the drag. The small pieces of wood on the inside help keep the packed sand from slipping out.
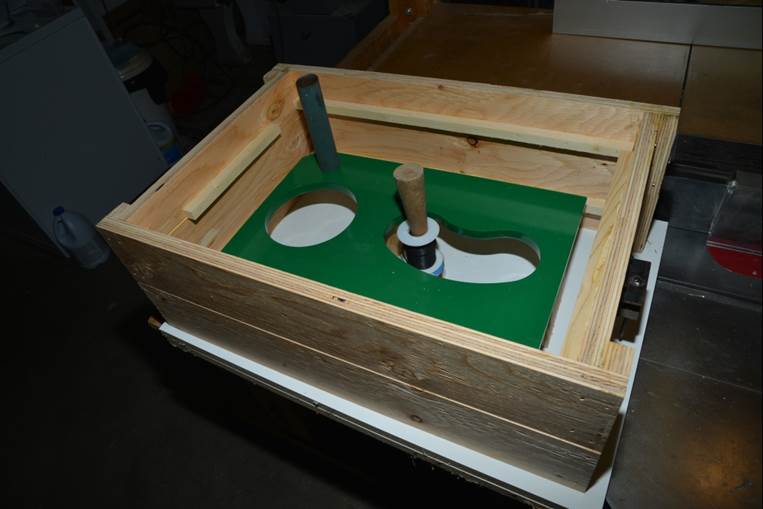
Granted I could probably have bought ¾” thick aluminium plate and cut the holes but even after destroying at least 3 end mills while building the tongs some of the other large patterns also require this big crucible. The one shown at the beginning for the harmonic drive will take about 10 lbs of aluminium. It pulls out of the sand nicely so should cast fairly well.
More to come.